Set up your account in Apple Mail
To add your e-mail account to the Apple Mail program, follow these steps:
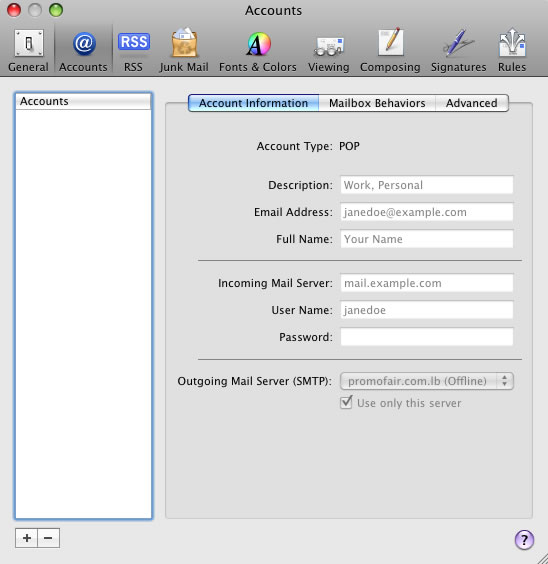
- Launch Apple Mail and when loaded, click on 'Mail' from the menu and then click on 'Preferences'
- Click on the 'Accounts tab' at the top of the window and then click on the + button at the bottom left part of the window
- On this screen you need to enter your name, e-mail address and password. In the 'Full Name' box enter the name that you would like to appear on someone's screen when they receive an e-mail from you. This could be your name or your business name. Once complete, click on the 'Continue' button
- The next screen is the 'Incoming Mail Server' screen. Enter the following information:
- 'Account Type' - select 'IMAP' from the drop-down box
- 'Description' - enter your e-mail address
- 'Incoming Mail Server' - type in mail.your-domain.co.uk, replacing your-domain.co.uk with your web site address (remember, do not enter the www. part of your web site address)
- 'Username' - enter your e-mail address
- 'Password' - enter the password for your e-mail account
- Once all of the information has been entered, click on the 'Continue' button
- The next screen is the 'Outgoing Mail Server' screen. Enter the following information:
- 'Description' - enter your e-mail address
- 'Outgoing Mail Server' - enter mail.your-domain.co.uk, replacing your-domain.co.uk with your web site address (remember, do not enter the www. part of your web site address)
- Tick the 'Use Authentication' box and enter:
- 'Username' - enter your e-mail address
- 'Password' - enter the password for your e-mail account
- Now click on the 'Continue' button
- On the 'Account Summary' screen, ensure that the 'Take Account Online' box is ticked and then click on 'Create'
- The account will now be added and you should be able to send and receive e-mails immediately. To test that everything is working as expected, we recommend that you send yourself an e-mail and make sure that it is received.
on 10/16/2015